LASERTEC 65 DED hybrid 2nd Generation
The next Era of Metal Additive Manufacturing!
Highlights

Technology integration at its best - 6 processes in one machine!
- Milling, turning, grinding, laser pre-heating, additive manufacturing and DMG MORI scan3D integrated in one single machine
- 5-axis material deposition with new multiJet nozzle allows homogeneous powder distribution, independent from direction of laser deposition welding
- 170% bigger workpiece vs. 1st Generation - Max. workpiece Ø 840 x 350 mm or Ø 680 x 400 mm → 71 % reduced cost per dm³
- 35 % higher build rate → 47% reduced cost per part
- The right laser source for each application - Infrared and blue laser technology available

Multi-Materials and Gradient Materials in one setup for improved part performance
- Selectively adding materials with more than 60 Rockwell to avoid heat treatment processes
- Improving cooling performance by using copper material in the mold core
- Better materials and improved reliability in the repair process for increased service life
- Improved performance of existing tool designs by adding wear resistant coating
- Material gradients between hard and soft, magnetic and non-magnetic, etc.

AM Assistant for best process reliability and comprehensive traceability
- Integrated thermal imaging camera for observation of the whole work area
--> possibility to control of the interpass temperature and use for laser pre-heating - Automatic calibration of powder mass flow and optical sensor for constant monitoring
- Integrated camera for thermal energy monitoring of the meltpool and closed-loop control of the laser power
- Lateral camera for constant control of the working distance
- AM Evaluator for visualization of the relevant process data (e. g. meltpool size, powder mass flow) as a digital 3D-model as well as in the chronological sequence

New powder management for maximum efficiency and performance
- Three different powder pot sizes available (S=0.5 l, M=2.3 l, L=5 l)
- Increased safety and efficiency due to easier handling and cleaning
- Argon pressurized powder containers during storing
- Integrated pressure leak check and level sensor (option)
- Automatic dust extraction of powder hopper cabinet
Application Examples
Control & Software

- 3D Shopfloor Programming for workshop-oriented programming with automatic feature recognition
- Advanced Surface and Top Surface: best workpiece surfaces with minimum machining time
- Optimized PLC cycle times
- Comprehensive machining cycles
- Powerful multicore system architecture for smooth operation with maximum CNC performance
- Familiar look & feel
- Standardized app-based user interface independent of the CNC control system
- Possibility of connecting the machine to the company organization
- Application for simple operation, extended spindle hours and increased energy efficiency
- Future-proof thanks to online update options
- Prepared for CELOS Xchange cloud connection
- NETserivce: Remote diagnostics and remote maintenance
- MDC: Standardized machine data output in OPC UA, MT connect and MQ TT formats
- Service Agent: Integrated maintenance manual
- 24” multitouch screen with horizontal screen orientation
- Full size tactile keyboard
- SMARTride potentiometer feed and rapid traverse combined
- SMARTkey in credit card format
- Ergonomic angle adjustment

- Vibration monitoring in the process
- Rapid shutdown in case of a crash
- Manual retraction even in swiveled machining plane
- NEW: Torque monitoring
- New: Recommended with Protection Package for CTX TC machines

- Avoiding tool breakage
- Increase in machine availability
- Damage reduction

- Chip detection on plan pad and tool cone
- Monitoring of pull-in force
- Cutting edge control in process by symmetry monitoring of the bending moment per cutting edge
- Visualization of the bending moment over time via Graph

- Geometric fingerprint of the machine Volumetric calibration at the touch of a button
- Detection and compensation of geometrical, positioning and angular errors of all axes
- Easy handling and implementation by the customer directly at the machine
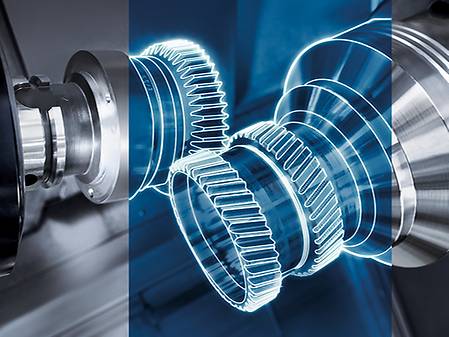
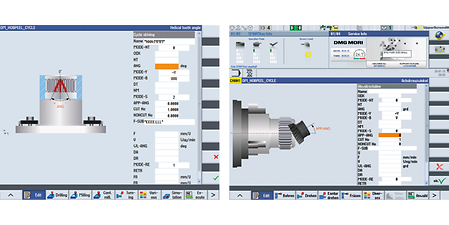
- Straight and helical external or internal spur gears and splines
- Arrow teeth with tooth offset Turn-mill machines
- Ball-shaped toothing by mathematical transformation of the 6th virtual axis

- Efficient use of multi-tip turning tools with more than one cutting edge on turn & mill
- Several "sister tools" on one main tool holder
- Reduction of tool change times
- Saves tool magazine space


- Non-contact measurement with the laser scanner
- Measurement and evaluation of gears according to common standards analog to coordinate measuring machines
- Fast measurement with max. 70,000 points / sec. or up to 200,000 points / sec. depending on the laser source
- Technology and measurement system integration eliminate unnecessary handling of components
- High flexibility in gear measurement and reduction of reaction times during process start-up
- Measurement of gear teeth and scanning of free-form surfaces possible

- Dressing of a profile on the grinding wheel by means of driven profile rollers (negative)
- Full utilization of AE sensor and integrated dressing strategies
- High time saving as well as high dressing accuracy due to customized dressing wheel development
- Tool and workpiece protection
- Optimized tool process
- Monitoring of the radial and axial spindle load depending on the actual pull-in force


- With interpolation turning, the tool cutter follows a circular movement, where the cutter is always oriented towards the center Of the circle.
- Possible for external and internal machining
- Synchronization and tool path controlled by the cycle
- NEW: in version 2.0 complex turning contours are possible (currently only available on the DMU 50, other machine types will follow)
- Easy manufacturing of sealing surfaces where milling operation might not be possible.
- Complete component processing in one clamping possible
- Reduced investment costs for tools


- Solutions for a safe process and for the efficient use of important machining steps
- Applications: cone cleaning, tool data monitoring, safe withdrawal movement, tapping, deep hole drilling, external thread and spigot milling, internal thread and circular milling, reverse countersink cycle
- 12 stored machining strategies for stock removal, deep hole drilling, Pocket milling machines*
- Runtime optimization according to individual application
- Safe retraction after program break
- Tool data monitoring

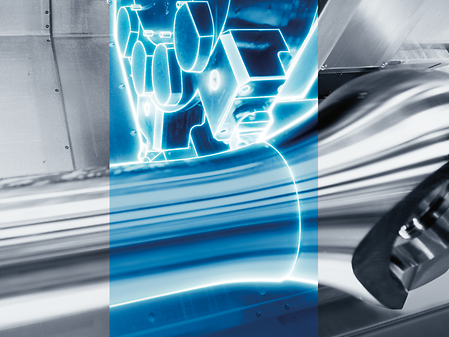
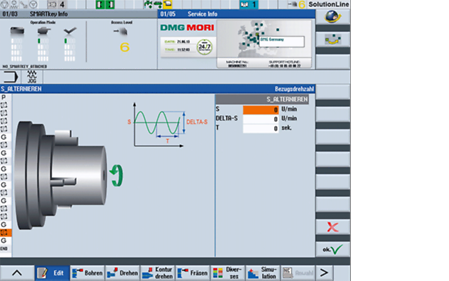
- Easy to operate through three parameters and without additional sensors
- Avoiding vibrations by means adaptation of the speed
- Application for the main spindle and counter spindle, or for milling machines with FD tables with Direct Drive
- No manual intervention by the operator
- Identical repeatability for all components
- Increased process safety for special applications by avoiding vibrations. example, When using long thin drills or for milling parts with critical clamping

- Measuring with tilted tool axis
- Dialog-guided programming of the measuring cycles
- Positioning of the measuring points with rotary axis

- Measurement of webs and grooves on components
- Measurement of diameter in difficult to access places
- Available with manual and retractable Calibration unit Package content
- L-Measuring probe according to Customer-specific design
- Flexible application possibilities
- In process measurement


- Automatic recognition of tool pull-in force for consistently high process stability.
- Predefined cycle for automatic lubrication, every 75h or after 20,000 tool changes.
- Detection of leakage and measuring of usage of pneumatics system.
- Efficient and timesaving lubrication without operator intervention
- High transparency by displaying the lubrication cycles and the current pull-in force.
- Data recording in combination with the optionally available Condition Analyzer for additional analyzes of air consumption and changes of the pull-in force


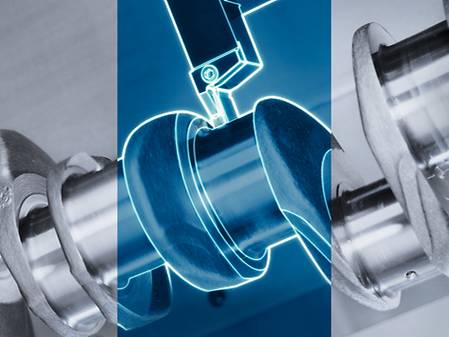
- Superposition of the turning movement by additional X- and Y-traverses
- Applicable for turning and milling
- Eccentric geometries easy to manufacture
- Exact axis coupling and synchronization in the background
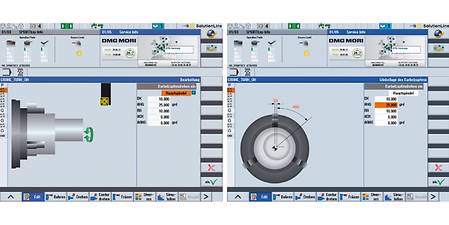

- Process-oriented adjustment of the feed rate n relation to the table loading
- Minimization of machining time with maximization of the component quality
- NEW: Now also available for CTX TC. Ideal machining result with the highest machine dynamics*
*without consideration of feed weight

- Highest flexibility in the machining of structural components due to variable alignment of the angle head
- Automatic CAD / CAM programming
- Automatic calculation of the TCP and combination with existing control functions

- Productive complete processing
- Cost-effective gear cutting on standard machine with standard tools
- Flexible for different gear geometries
- Quality inspection in the process
- Program creation based on blank drawings and gear data
- Optimization of workpiece orientation e.g. after heat treatment
- Interface for coordinate measuring device (Klingenberg, Leitz, Zeiss)


Turning
- Measurement and correction of the position of turning and Pivot axes (C4, C3, B)
- Sag compensation possible
- Can be used in combination with standard probes from customers (recommended Renishaw, Blum)
Milling
- Toolkit for checking and correcting the kinematic accuracy of 4- and 5-axis machine configuration
- All head variations and table axes
- Reliable re-calibration of the machine before a highly precise processing
- Continuous documentation of machine accuracy
- No rejected parts due to unknown Geometric-deviations

- Periodic recalibration of the machine with comprehensive documentation
- Highest kinematic accuracy in self-regulation


Turning
- Turning, milling and grinding in one clamping
- Grinding cycles for internal, external and face grinding as well as dressing cyclesn
- Body-borne sound sensors for start-up and dressing
- Full integration of measurement module for relative and absolute LIVE-Measuring – parallel to main time
Milling
- Better surface quality through integration of the grinding technology
- Grinding cycles for internal, external and face grinding as well as dressing cycles
- Body-borne sound sensors for start-up and dressingn
- 1,300 l Cooling system with integrated centrifugal filter for The filtration of particles > 10 μ
- AKZ nozzle unit optionally available for best possible Flushing of the grinding gap

- Expansion of the technological limits of the CTX TC
- Surface accuracy < 0.4 μm
- Roundness < 5 μm
- Quality IT5 for ø > 30 mm
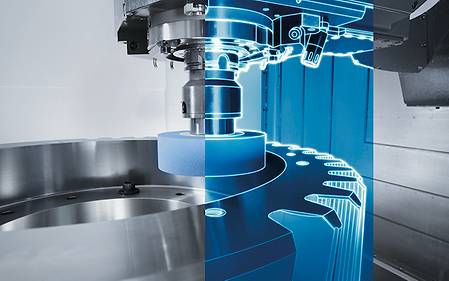
- Surface accuracy < 0.4 μ
- Roundness < 5 μ
- Quality 5 for ø < 120 mm
- Quality 4 for ø > 120 mm
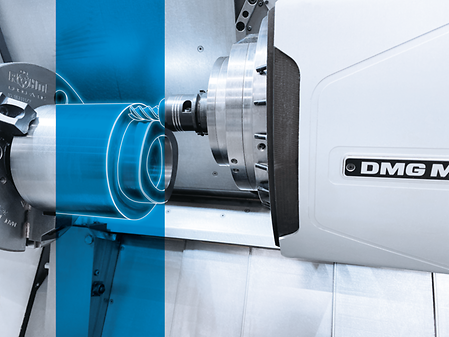
- Milling of oval and polygonal geometries
- Machining of excentric face polygons possible
- Simple selection of suitable machining strategies
- Simple parametric definition of the shaft-hub connection according to DIN 32711 and DIN 32712
- Enable the machining of small workpieces or those made of long-chipping materials. The perfect complement to Polygon / Oval-Turning.


- Visualization of relevant process data (for example, melt pool size, powder mass flow) as a digital 3D model and over time
- Detailed analysis of process data
- Direct comparison of processes for quality assurance
- Creation of part reports
- Simplification of process development
- Support in quality control
- Enables individual analysis and work up of process-relevant data
- Easy retrofitting of the software within the AM-Analyzer product package (Existing software can still be used)

Service & Training
Downloads & Technical Data
Special technical articles, analyses and background information on topics that move our industry.
- Unlimited product experience – unlock all technical machine data and product brochures.
- Exclusive videos, technical articles, whitepapers and blog articles with deep insights into the DMG MORI product world.
- Personalised access to other DMG MORI Platforms, including Event Platform, Media Library and much more.
Discover exclusive content with your DMG MORI Account.
- Unlimited product experience – unlock all technical machine data and product brochures.
- Exclusive videos, technical articles, whitepapers and blog articles with deep insights into the DMG MORI product world.
- Personalised access to other DMG MORI Platforms, including Event Platform, Media Library and much more.
Learn more about the DMG MORI Account.
Get access to many useful digital functions and services and have all important data at a glance. With a central DMG MORI Account, you can use all services around the clock from anywhere and with any device.
- Unlimited product experience – unlock all technical machine data and product brochures.
- Exclusive videos, technical articles, whitepapers and blog articles with deep insights into the DMG MORI product world.
- Personalised access to other DMG MORI Platforms, including Event Platform, Media Library and much more.
Learn more about the DMG MORI Account.
Unlock access to your Share Hub and many other functions and services. With a central DMG MORI Account, you can use all services around the clock from anywhere and with any device.
- Unlimited product experience – unlock all technical machine data and product brochures.
- Exclusive videos, technical articles, whitepapers and blog articles with deep insights into the DMG MORI product world.
- Personalised access to other DMG MORI Platforms, including Event Platform, Media Library and much more.
Learn more about the DMG MORI Account.
For general enquiries, please use our contact form.
For service and spare parts enquiries please use the my DMG MORI portal: https://mydmgmori.com/
Thank you very much for your interest.
Please fill out the form below to download the requested document.
If you accept the storage of cookies, this form appears only once during your visit.


